

Build Guide · Infiniti Q50
How We Built a Fully Synchronized RGBW Lighting System on an Infiniti Q50
From the grille to the door handles, here's exactly how our shop turned a 2016 Infiniti Q50 into a rolling light show — and how you can apply the same techniques to almost any vehicle.

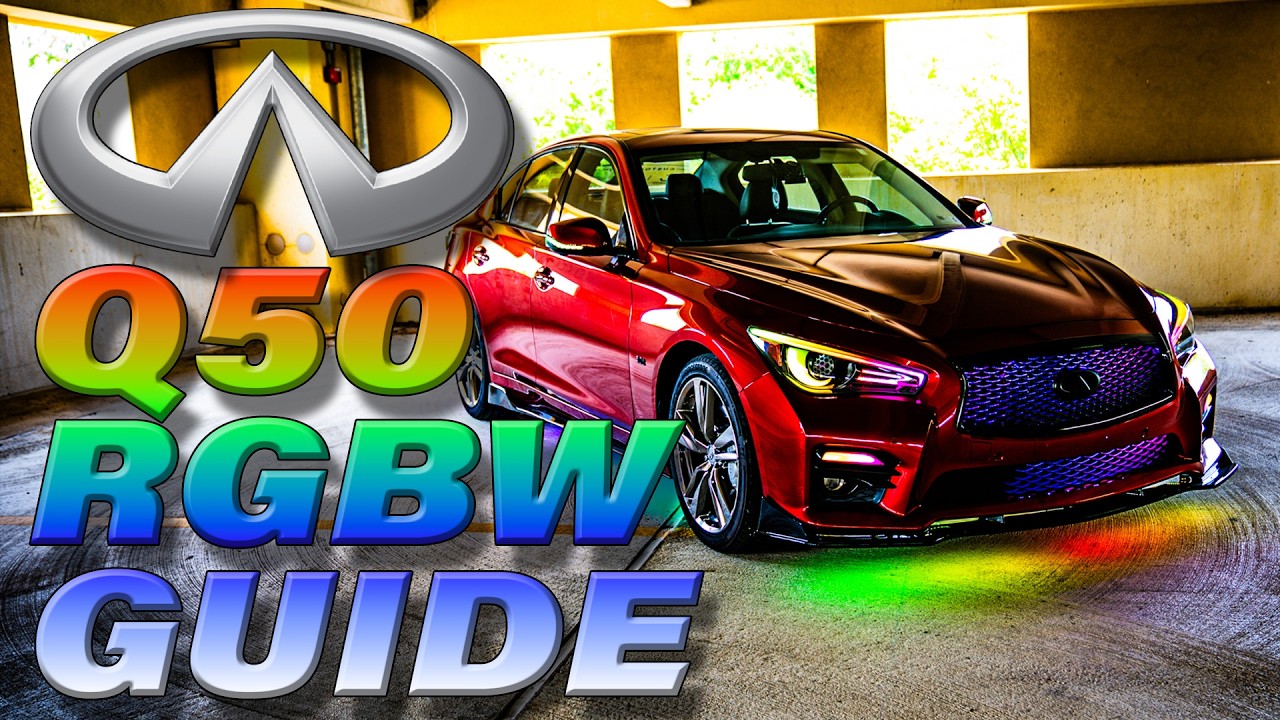
The goal: one continuous "flow" from the front of the car to the back
We recently picked up a 2016 Q50S for the shop, and there was no better place to start than the lighting. The finished front end runs custom RGBW grille lights (upper and lower), modified OEM headlights with a frosted DRL bar, custom acrylic gills, RGB demon eyes and a diffused crescent, frosted bumper turn signals, upgraded mirror lights, lit door handles, and best-tier underglow — all driven by a single controller.
The magic is that the animation flows: it starts in the grille, moves outward into the headlights, down to the lower turn signals, out to the mirrors, and into the door handles. That effect is only possible because of one key decision we make before cutting a single wire — running in series, not parallel.
Series vs. parallel: the single most important concept
Addressable LEDs have a power, a ground, and a data line. Data goes into one LED, out to the next, and on down the chain. Wire your devices in series — controller → grille → headlight → turn signal → mirror → door handle — and each section keeps independent control, so the light can flow across the whole car in sequence.
Run it in parallel (splitting the data line with splitters) and everything after the split reacts at the same time — you lose the flow. Our rule of thumb: use parallel only inside a single device where you want two strips to mirror each other (like the top and bottom of the grille), and never between separate devices. If you're hiring a builder, make sure they are not using data splitters between your lights.
New to this? Watch our quick explainers on series wiring and parallel wiring.

Building the grille lights
We used our UCS2904 12 mil RGBW strips at 144 LEDs/meter so the grille flows at the same rate as the headlights. Because those strips aren't waterproof, we mount them in aluminum rails, cut to size, and fully encase them in clear, UV-resistant two-part epoxy. (UV resistance matters — not for the sun, but because the LEDs themselves will yellow cheap epoxy over time and dim your output.)
A few shop tips that make grille strips last:
- Start the flow in the center. Run two strips — left and right — so the animation begins in the middle of the car and sweeps outward for the most cohesive look.
- Pre-tin your solder pads with flux before attaching wires. It cuts the heat time on the pad and makes for a cleaner, more reliable joint.
- Lock your solder pads with CA glue + activator. The number-one failure we see on rigid strips is a pad ripping off from vibration. A dab of CA glue over the pad dramatically reduces that.
- Line your rails with electrical tape so nothing on the back of the strip shorts against the metal, then dam the open ends before you pour epoxy.
Power injection & a battery saver (don't skip these)
If all your power and ground had to travel through the first little strip and then through every LED down the line, that's a heavy load on one tiny section. Instead we inject power and ground wherever it's needed and only pass the data line device-to-device. Data happily crosses between 5V and 12V sections; power does not — a 5V device needs 5V, a 12V device needs 12V, so we drop in inverters at the 5V points (like the demon eyes).
We also run everything through a battery saver module. It cuts power to the LEDs when the controller is off, so a parked car doesn't slowly drain the battery. All power and ground for the LEDs come out of the battery saver. (See our battery-saver wiring video.)
Modifying the OEM headlights
OEM (and Depot) lights open cleanly in the oven — we run ours at roughly 215–220°F for about 10 minutes. (Always set the light on a block of wood, never directly on a metal rack, and avoid any chemically-treated materials in the oven.) Cheaper Amazon lights are often "permasealed" and much harder to open, so if you can, start with OEM or Depot.

The frosted DRL bar
The easy way — laying a strip behind the acrylic — leaves visible hot spots and dead corners. For a truly diffused DRL bar, we cut a channel behind the bezel so the LEDs sit about a half-inch to an inch back, frost the acrylic on both sides, and box in the cavity so light can't leak where it shouldn't. The result is a smooth, even glow with no visible LEDs.
Custom acrylic gills (high-beam delete)
We deleted the high beam and replaced it with laser-cut acrylic gills designed to mirror the car's lower fog-light bezel. Prefer something simpler? A block-off plate with an etched pattern or logo is a great, easier alternative. Key trick: cut acrylic slightly oversized and trim to fit — you can always remove more, but you can't put it back.
Demon eyes, the crescent & the projector
We upgraded to bi-LED projectors (high and low in one), etched the lens, added an RGB demon eye, and shaped UCS strips into a diffused crescent around the projector. Two things to note: the projectors don't include demon eyes (order those separately), and the demon eye is 5V, so it gets its own dedicated 5V inverter — a demon eye can pull real amperage, and we'd rather over-spec than chase problems later.

The rest of the car
Bumper turn signals: frosted from behind with aluminum oxide, LED strip dropped into the reflector channels, then welded shut and sealed with gasket maker.
Mirror lights: the eBay RGB units look bad and aren't RGBW-compatible, so we gutted them and packed in our 8 mil UCS2904 for a bright, uniform, RGBW-matched glow — plus a small three-LED section reserved for a side turn-signal.
Door handles: a 15-LED section of our coated, ultra-thin SK6812 IP65 strip per handle (one roll does the whole car). On the front handles, mind the keyless-entry sensor — keep it clear so touch-to-unlock still works.
Reliability details that separate a pro build from a headache
- Add breather vents. More LEDs mean more heat. We add a few vents, spread out (two top, two bottom), so heat doesn't pocket inside the housing.
- Junction your power and ground. All grounds together, all 12V together — redundant, clean, and reliable.
- Route away from heat and moving parts. Keep wiring off the radiator, engine, and anything that moves; zip-tie it up and out of the way.
- One plug in, one plug out. We consolidate power, data-in and data-out into a single barrel plug per light for easy removal.
Everything you need for this build
The complete parts, consumables and tools list. Next Level Neo parts link in-house; a few consumables and tools link out to where we source them.
Grille
Headlights
- Bi-LED projectors — link coming soon
- RGB Demon Eyes (5V)
- 5V 6A PnP inverter (for the demon eyes)
- UCS2904 12 mil RGBW strips (DRL, gills & crescent)
Lower turn signals
- Frosted turn-signal lenses (frosted from behind)
- UCS2904 RGBW strips (behind the diffuser)
Mirrors
- Aftermarket RGB mirror lights — rebuilt with better LEDs
- UCS2904 8 mil RGBW strips
Door handles
- SK6812 IP65 addressable RGBW strip — front & rear handles
Controller
- Apex Flow LED Controller — the one controller running this entire car, front to back (👀 coming soon)
Consumables
Fabrication materials
Tools
- Sugon A9 soldering station
- Heavy-duty wire cutters
- Tin snips
- Echo Tech ZO-95 ultrasonic cutter (preferred)
- Dremel (alternative)
- Blast cabinet + aluminum oxide
- FLUX beamo 30W CO2 desktop laser cutter (MatterHackers)
- X-Acto knife
- Hook pick
Vector files & plug diagram are linked in the video description.
Shop the RGBW lighting kit & controllers at Next Level Neo
Tell us in the comments what vehicle you'd like to see us build next.